# Google Tag Manager Integration
To install Backtracks Attribution in Google Tag Manager, just follow the steps below. If your Shopify theme happens to have a custom method to add third-party JavaScript, ask your Shopify administrator or developer to adapt these steps to your theme or custom method.
# Steps
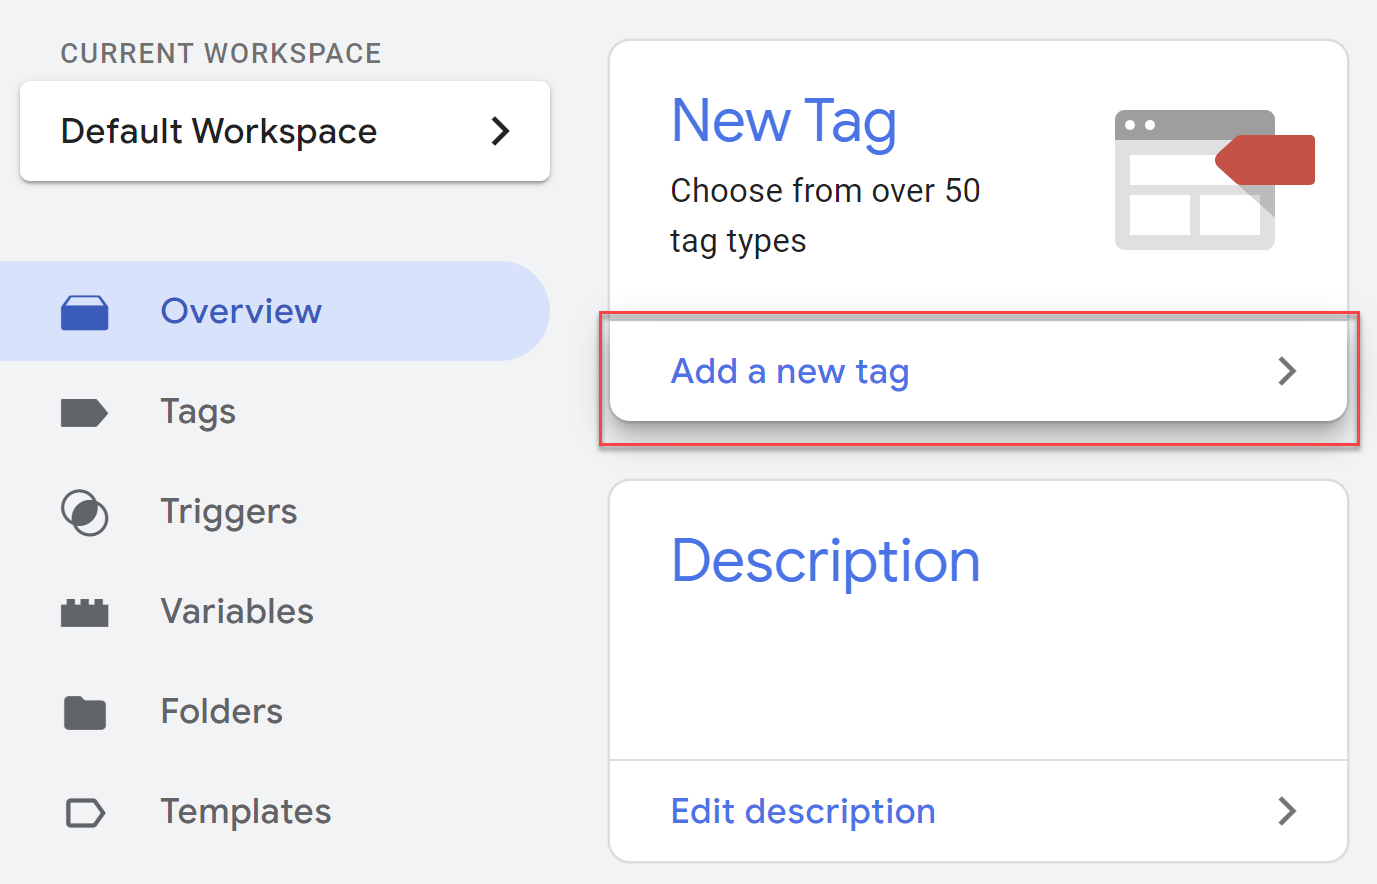
# Add New Tag
In the Google Tag Manager tag configuration area, select Add New Tag for the workspace.
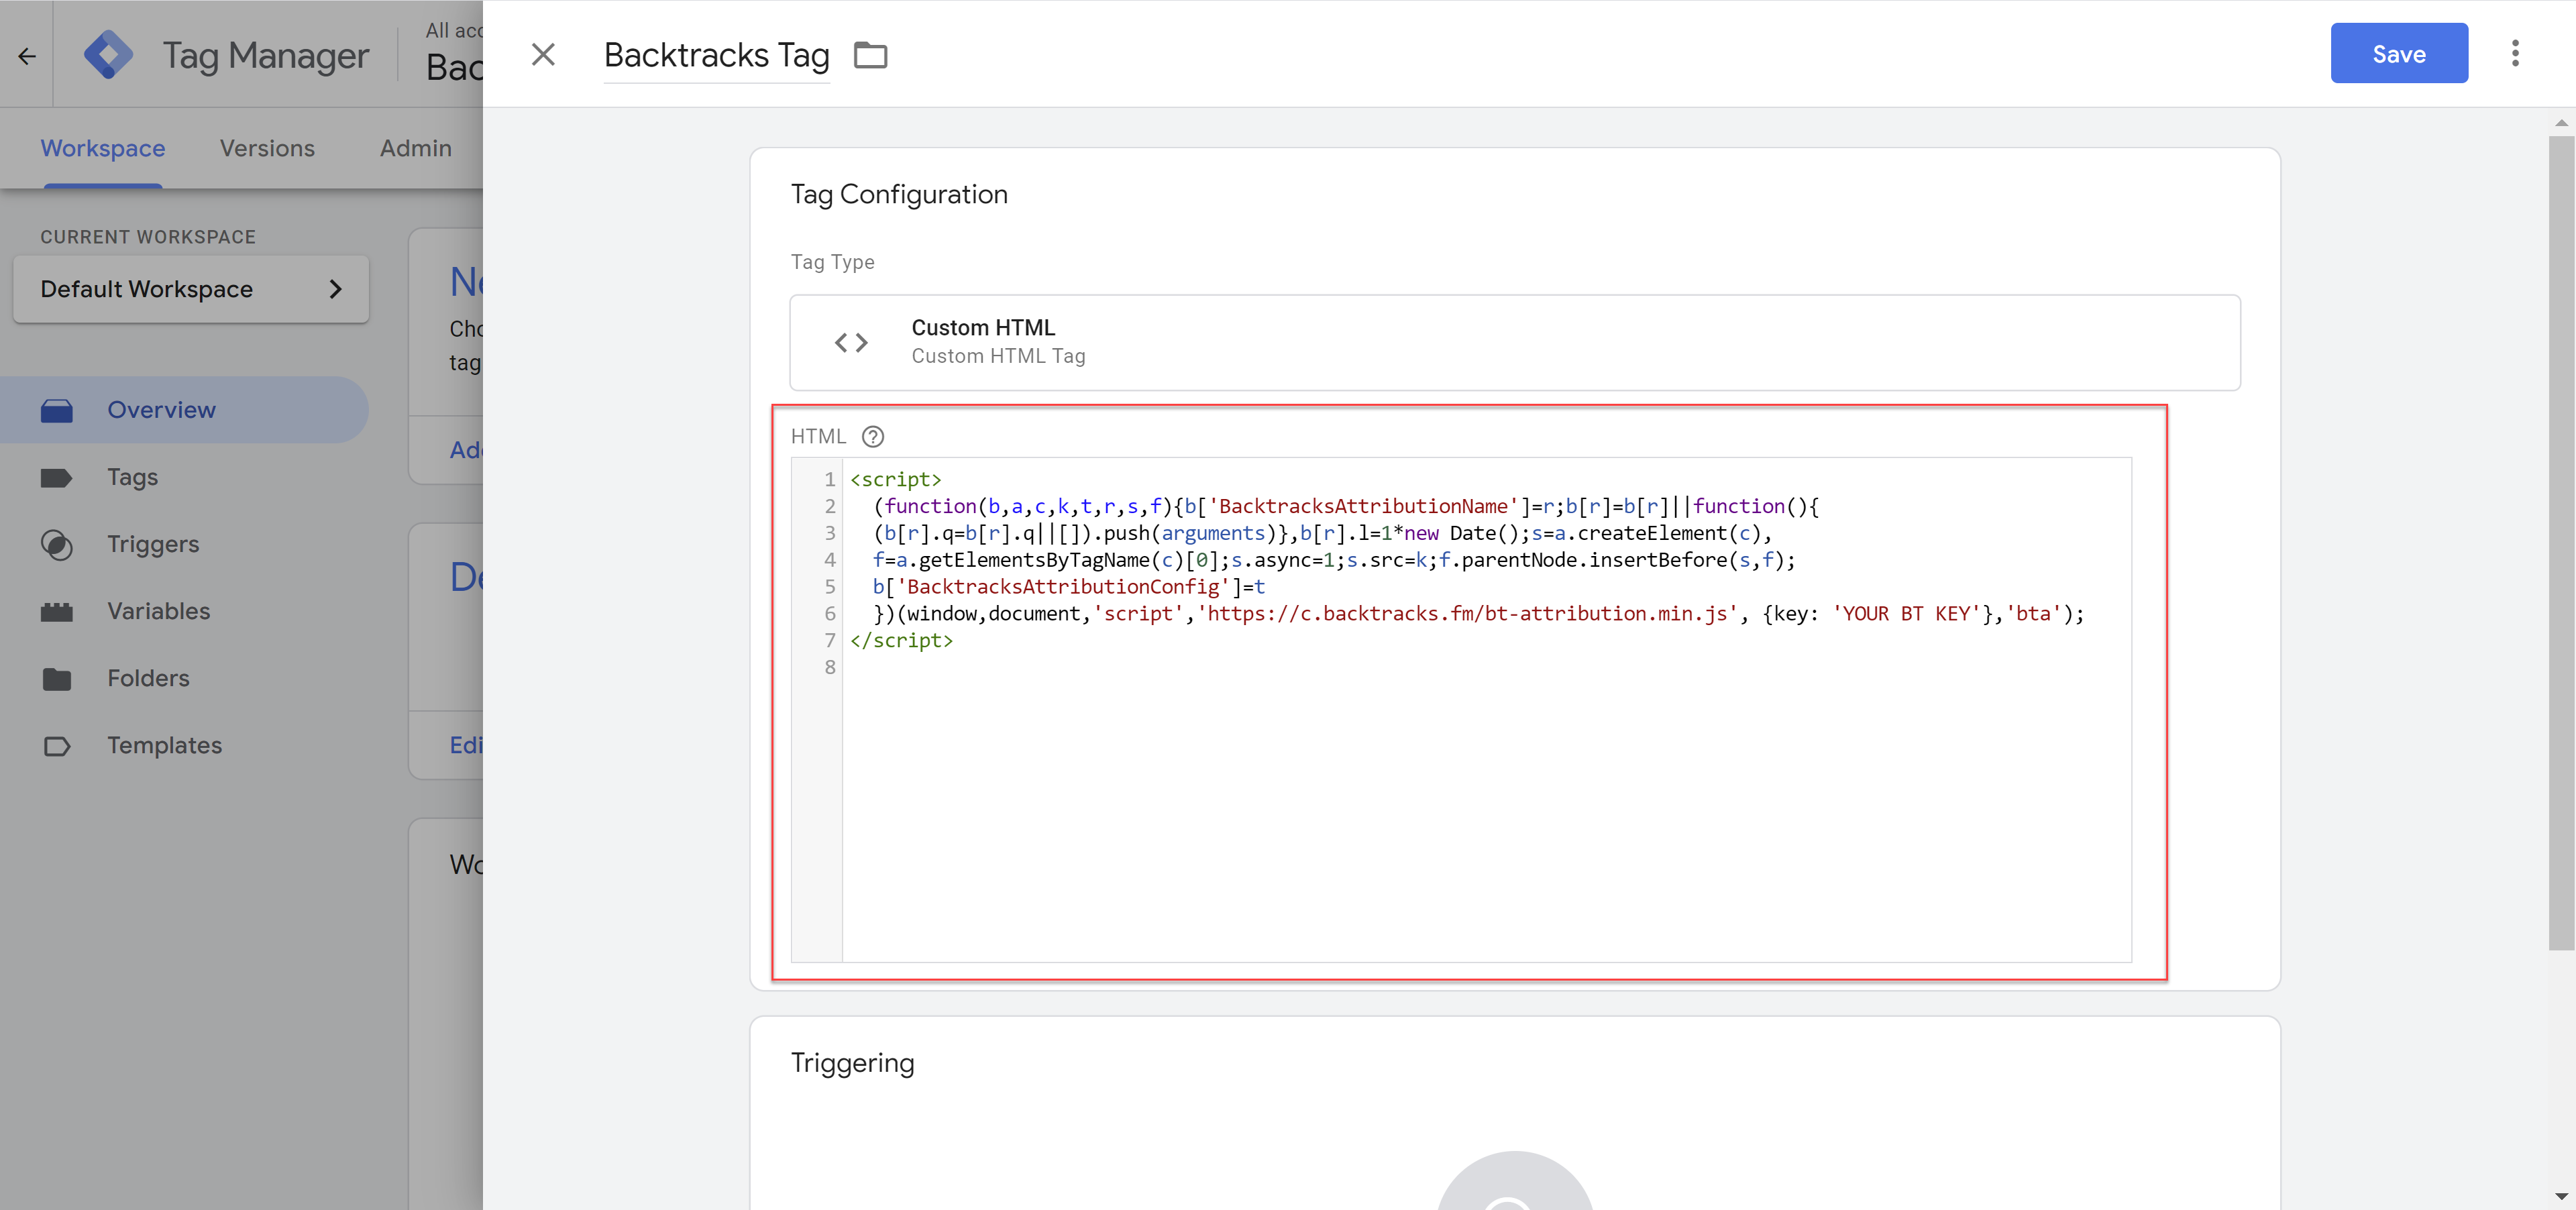
# Add Custom HTML Tag
Choose a Custom HTML as the tag type.

# Copy and Paste Code
Copy and paste the install script into the HTML code input box. Be sure to replace "YOUR BT KEY" with your actual key.
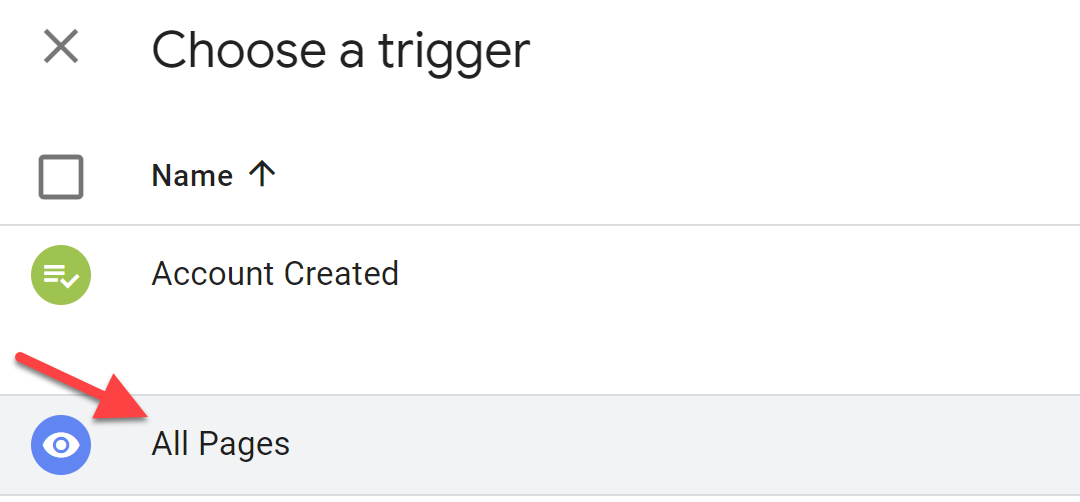
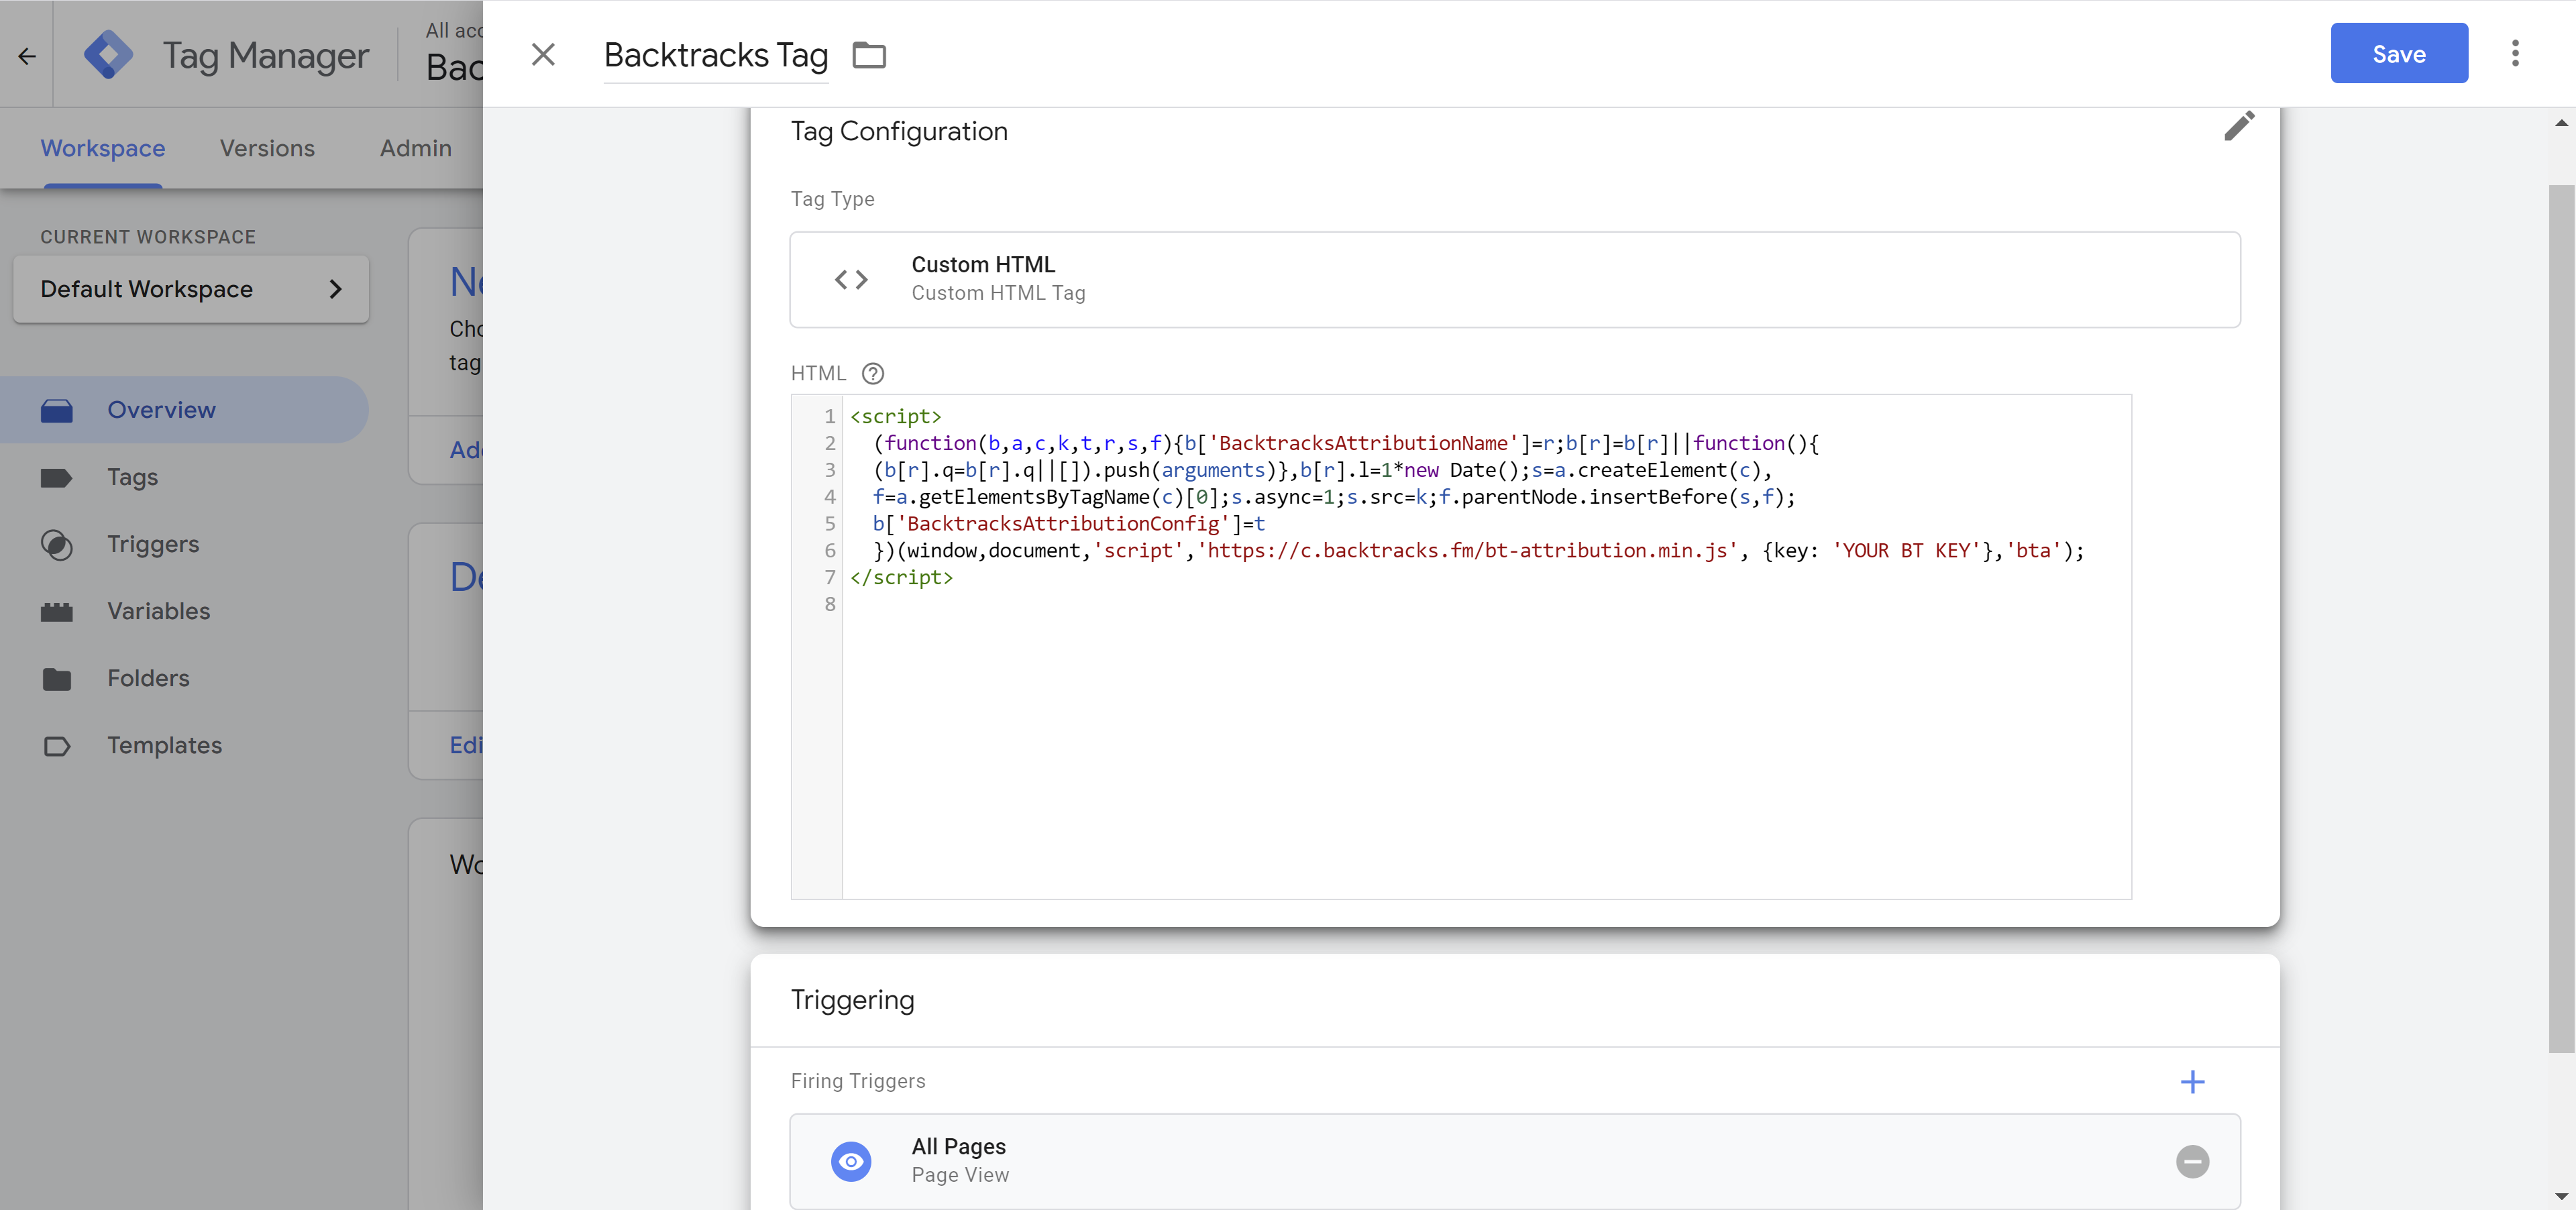
# Select Trigger
Select the trigger that should run the code, i.e. All Page Views. If you have specific triggers, those may be tied to events that Backtracks Attribution should track.
# Enable Tag
Finally, save and publish the changes and that's it!
# Conversion Events
To record conversion events like lead, purchase, etc. you will need to ensure that the Backtracks Attribution script is included on the page before running any code to record the event(s). The install script may be it's own tag with lead, purchase, etc. events being their own separate tags in Google Tag Manager. Example events that may be triggered as custom tags in Google Tag Manager can be seen here.
<script>
  // START: INSTALL
  // Note: The Backtracks Attribution install script will only run once per page even if called multiple times.

  (function(b,a,c,k,t,r,s,f){b['BacktracksAttributionName']=r;b[r]=b[r]||function(){
  (b[r].q=b[r].q||[]).push(arguments)},b[r].l=1*new Date();s=a.createElement(c),
  f=a.getElementsByTagName(c)[0];s.async=1;s.src=k;f.parentNode.insertBefore(s,f);
  b['BacktracksAttributionConfig']=t
  })(window,document,'script','https://c.backtracks.fm/bt-attribution.min.js',
  {key: 'YOUR BT KEY'},'bta');

  // END: INSTALL

  // Use any GTM (Google Tag Manager) variables that you have set up that may be appropriate
  bta("purchase", {
    transactionId: "{{ gtm_order_id_variable }}",
    value: {{ gtm_order_price_variable }},
    currency: "USD"
    // ...
  });
</script>
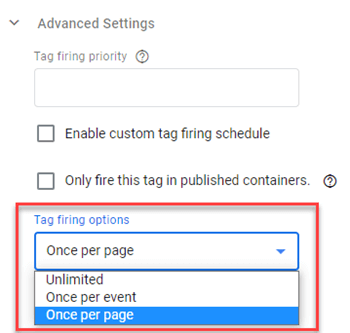
Ensure that the tag in GTM (Google Tag Manager) is set to only fire Once Per Page or Once Per Event for events that occur on/after form submission, button click, etc. instead of on page load (i.e. confirmation pages can trigger the appropriate the tags on page load).
TIP
Google Tag Manager has a debug/preview mode for tags to allow you to preview changes before they are applied to your page or site. If you are testing your tag implementation in Google Tag Manager aka GTM in the debug/preview mode, you may see duplicate loads of a tag due to this (1). In the actual published container on a live page, this debug/preview issue is not present in GTM. Single page apps may see a similar issue in GTM.