# Shopify Integration
To install Backtracks Attribution in Shopify, just follow the steps below. If your Shopify theme happens to have a custom method to add third-party JavaScript, ask your Shopify administrator or developer to adapt these steps to your theme or custom method.
# Theme Install
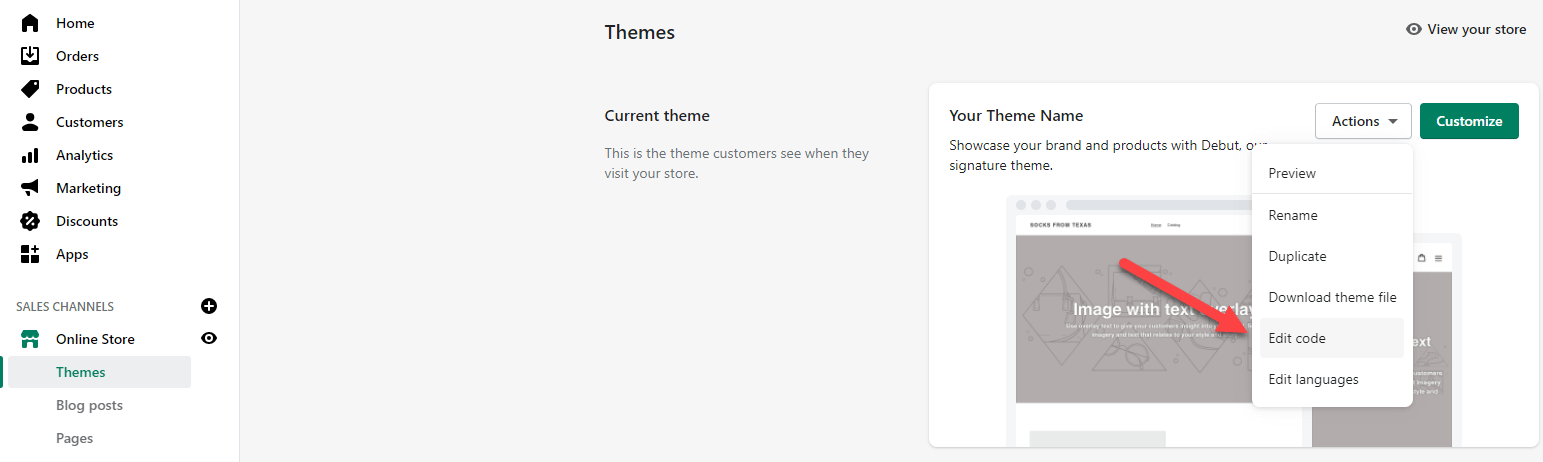
In the Shopify admin area, open the Online Store settings from Sales Channels > Online Store.

Select Edit Code from Sales Channels > Online Store > Themes for your theme.
From the list of template files, select/open the theme.liquid file. Add the Backtracks Attribution installation code just before the </body> tag and the end of the theme.liquid file. Be sure to add your BT KEY.
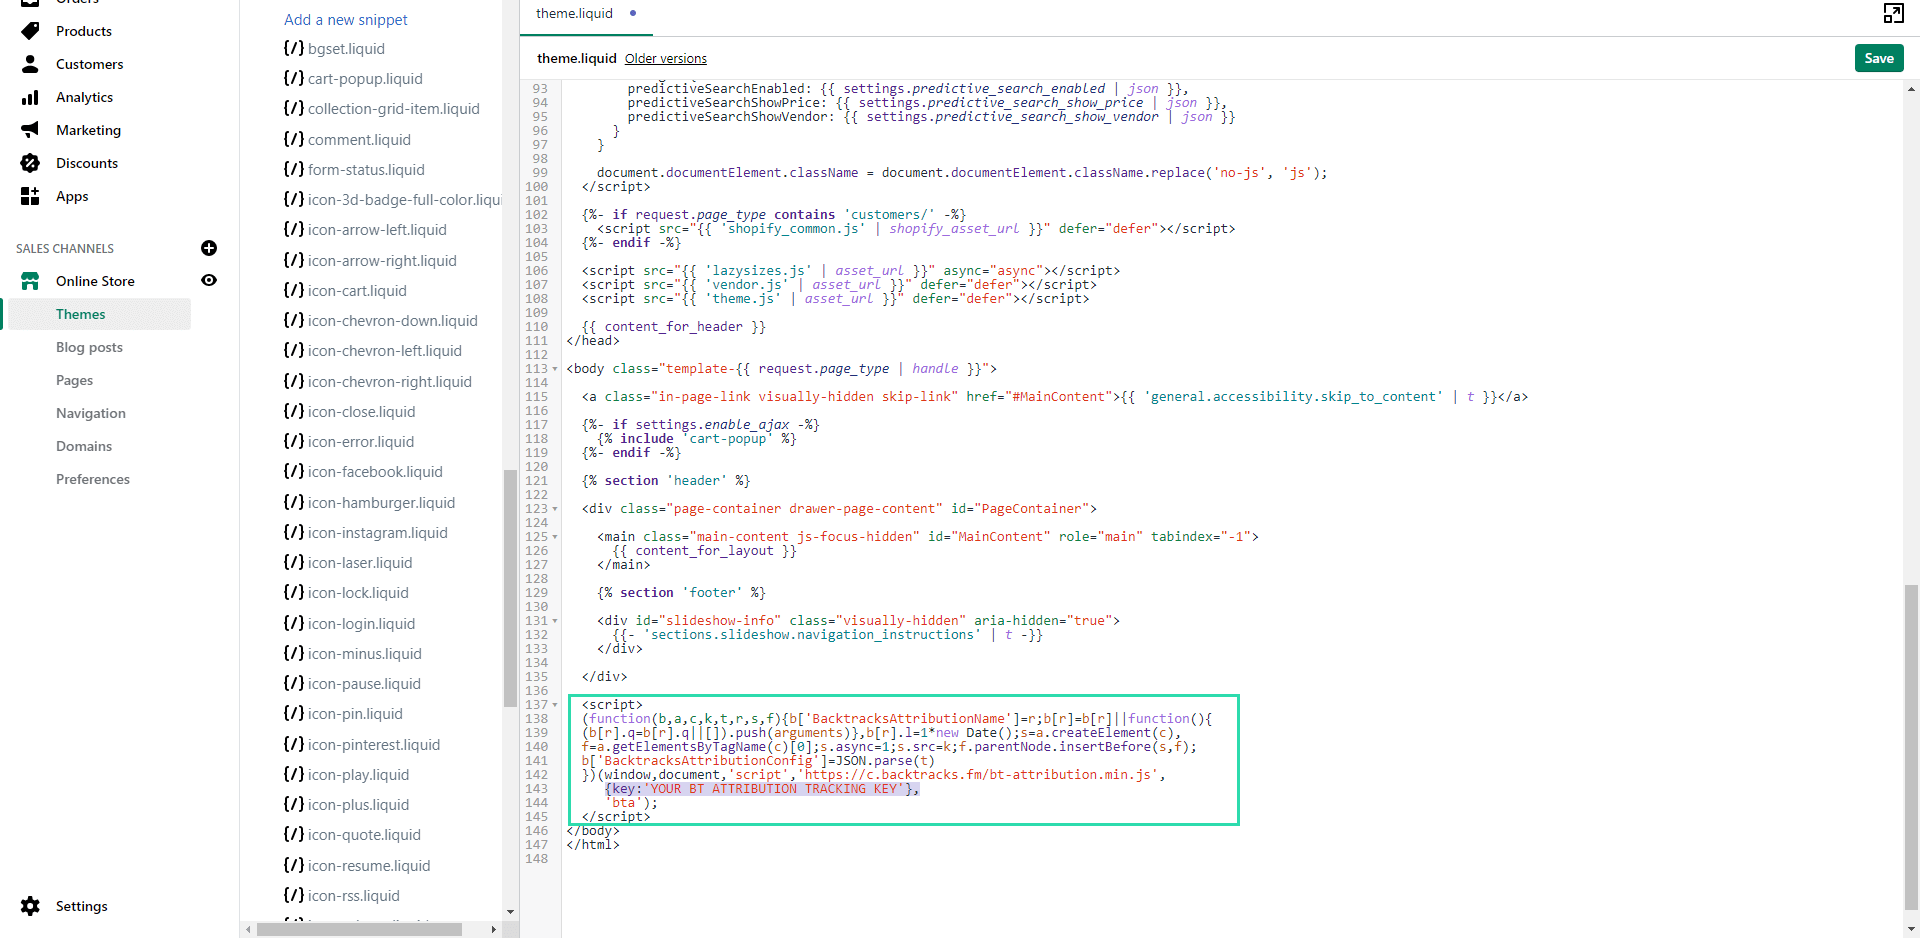
Save your changes and that's it!
# Purchase Event
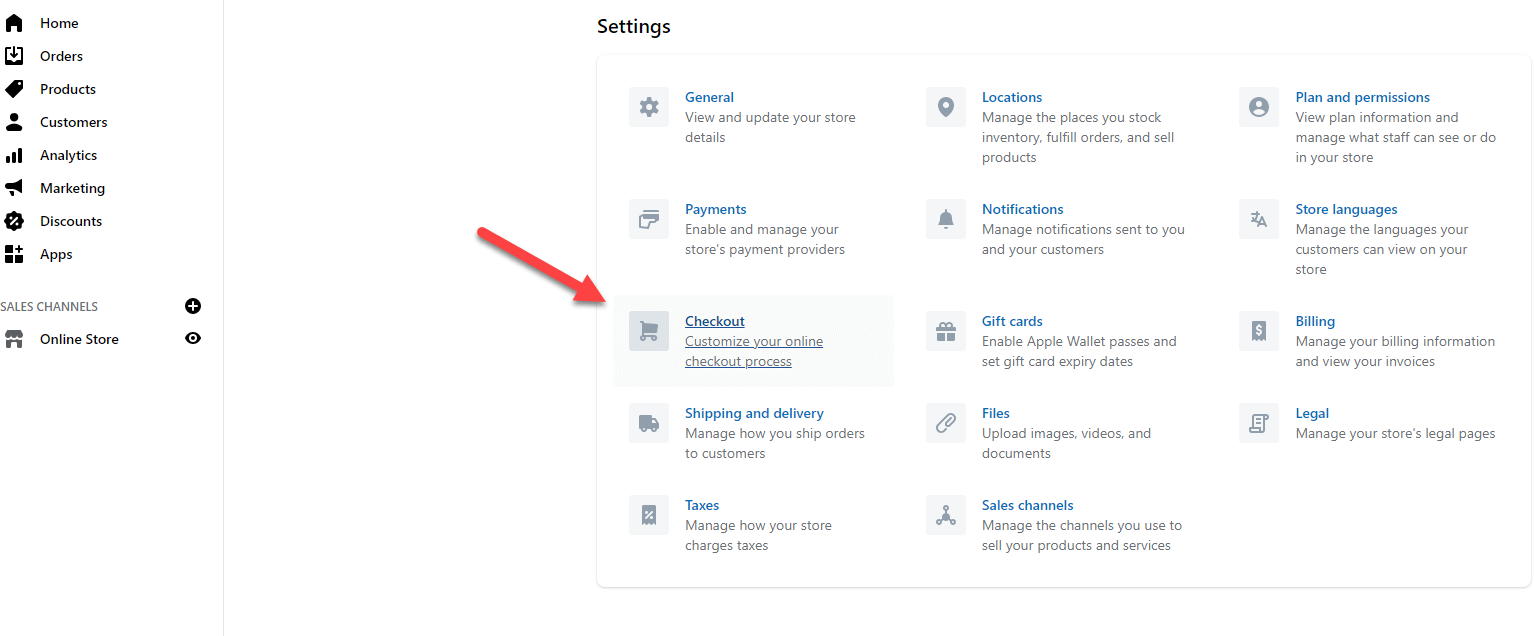
To record the purchase event, you will need to add the code at a different location. From the Shopify admin area, edit your Checkout settings from Settings > Checkout.
In the Order Processing section of the Checkout Settings, locate the Additional Scripts section.
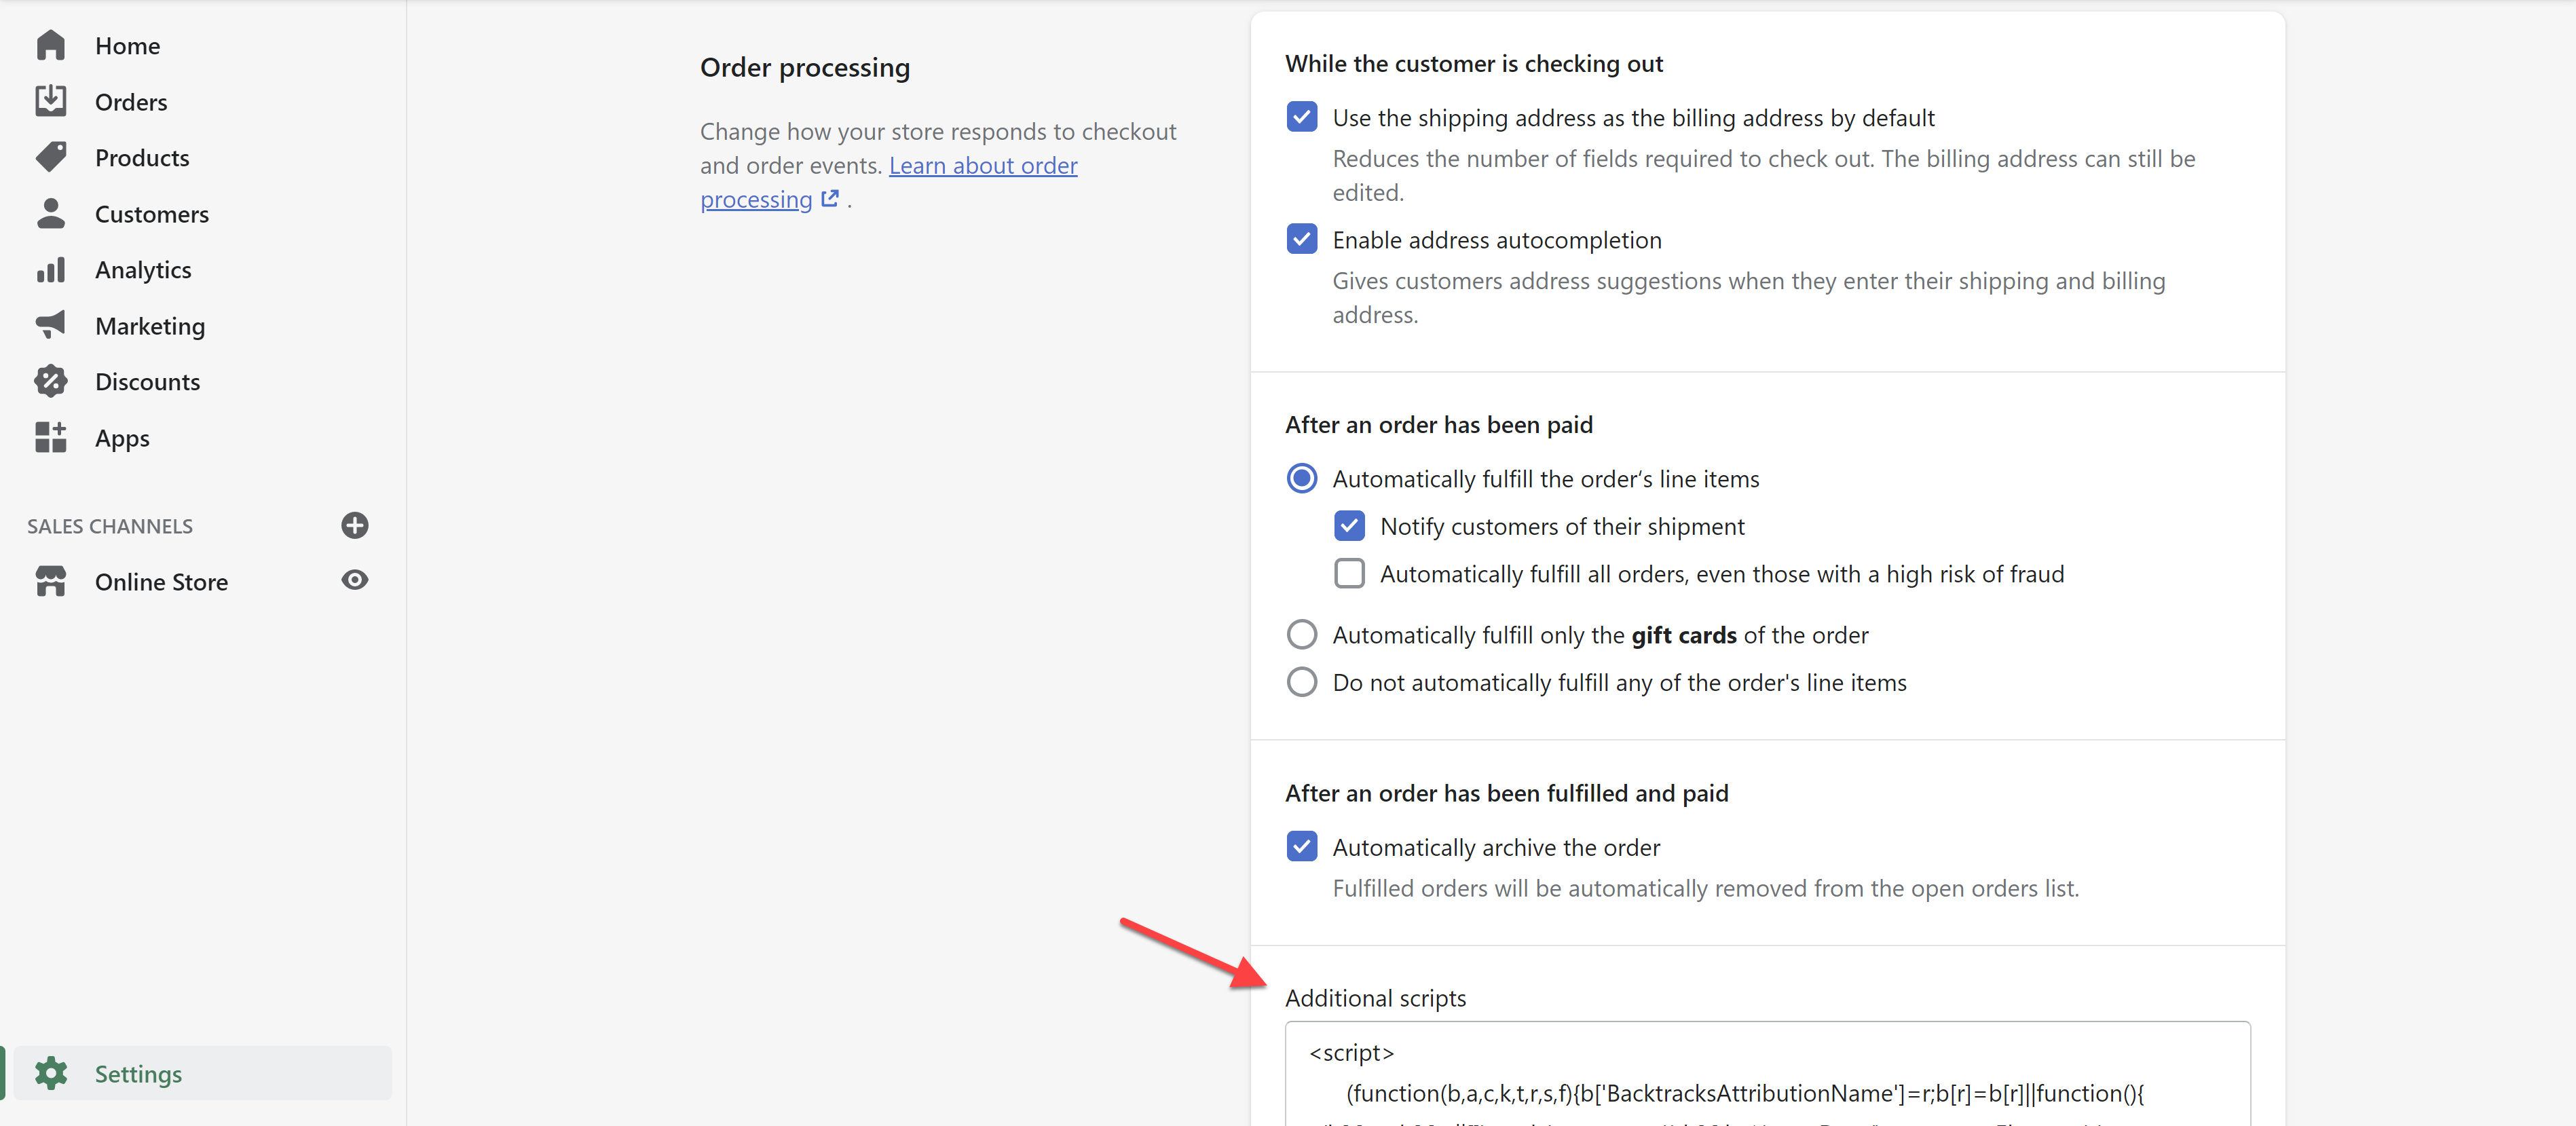
Add the following code and be sure to replace YOUR BT KEY with your key then Save your changes and that's it!
<script>
  (function(b,a,c,k,t,r,s,f){b['BacktracksAttributionName']=r;b[r]=b[r]||function(){
  (b[r].q=b[r].q||[]).push(arguments)},b[r].l=1*new Date();s=a.createElement(c),
  f=a.getElementsByTagName(c)[0];s.async=1;s.src=k;f.parentNode.insertBefore(s,f);
  b['BacktracksAttributionConfig']=t
  })(window,document,'script','https://c.backtracks.fm/bt-attribution.min.js',
  {key: 'YOUR BT KEY'},'bta');

  {% assign discount_code = '' %}
  {% for discount in checkout.discounts %}
     {% assign discount_code = discount.code %}
  {% endfor %}

  var btaLineItems = [];
  {% for line_item in line_items %}
    btaLineItems.push({
      id: "{{ line_item.id }}",
      sku: "{{ line_item.sku}}",
      name: "{{ line_item.title }}",
      brand: "{{ line_item.vendor }}",
      category: "{{ line_item.product.type }}",
      quantity: {{ line_item.quantity }},
      variant: "{{ line_item.variant.title }}",
      price: {{ line_item.final_price}}/100
  });
  {% endfor %}

  {% if first_time_accessed %}
  bta("purchase", {
    transactionId: "{{checkout.order_id}}",
    value: {{checkout.total_price}}/100,
    tax: {{checkout.tax_price}}/100,
    shipping: {{checkout.shipping_price}}/100,
    storefrontId: "{{ shop.id }}",
    storefrontName: "{{ shop.name }}",
    currency: "{{ currency }}",
    locale: Shopify.locale,
    {% if discount_code != '' %}discountCode: "{{discount_code}}",{% endif %}
    {% if line_items and line_items.size > 0 %}items: btaLineItems{% endif %}
  });
  {% endif %}
</script>
# View Item Event
If you wish to record details of an item/product view (the purchase event is the most important to track), use the following code sample.
In the Shopify admin area, open the Online Store settings from Sales Channels > Online Store.
Select Edit Code from Sales Channels > Online Store > Themes for your theme.
From the list of template files, select/open the product-template.liquid file. Ensure that you have added the Backtracks Attribution installation code to your storefront's theme.
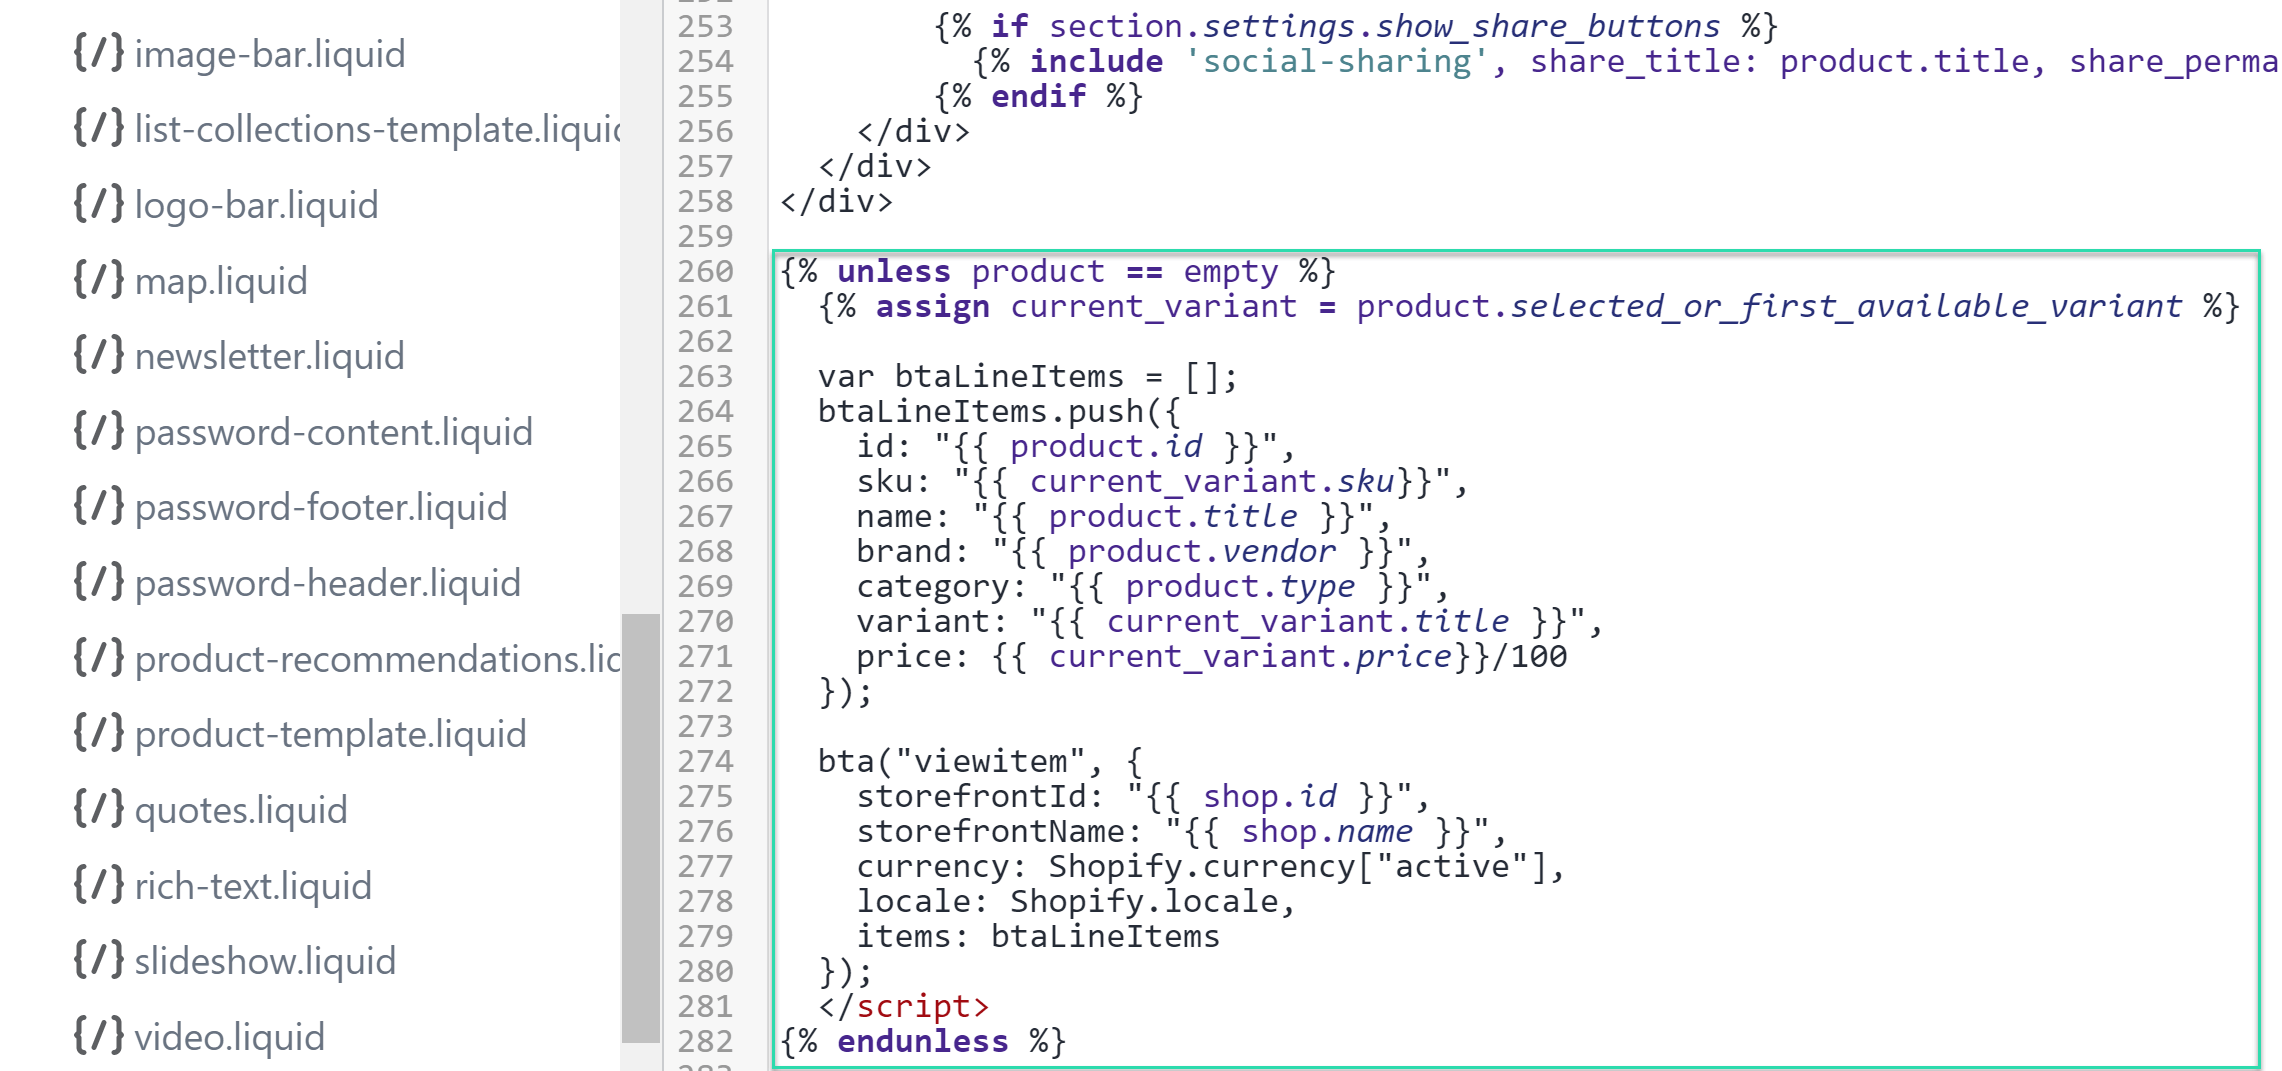
Save your changes and that's it!
{% unless product == empty %}
  {% assign current_variant = product.selected_or_first_available_variant %}
  <script>
  var btaLineItems = [];
  btaLineItems.push({
    id: "{{ product.id }}",
    sku: "{{ current_variant.sku}}",
    name: "{{ product.title }}",
    brand: "{{ product.vendor }}",
    category: "{{ product.type }}",
    variant: "{{ current_variant.title }}",
    price: {{ current_variant.price}}/100
  });

  bta("viewitem", {
    storefrontId: "{{ shop.id }}",
    storefrontName: "{{ shop.name }}",
    currency: Shopify.currency["active"],
    locale: Shopify.locale,
    items: btaLineItems
  });
  </script>
{% endunless %}